User Roles and Permissions
ABetterChoice ships with a deliberately small permission model so you can adopt it on day one: two roles, scoped per project, managed from a single page.
Roles
| Role | Read | Modify experiments / configs / metrics | Manage members |
|---|---|---|---|
Admin | Everything | Yes | Yes |
Member | Everything | Yes | No |
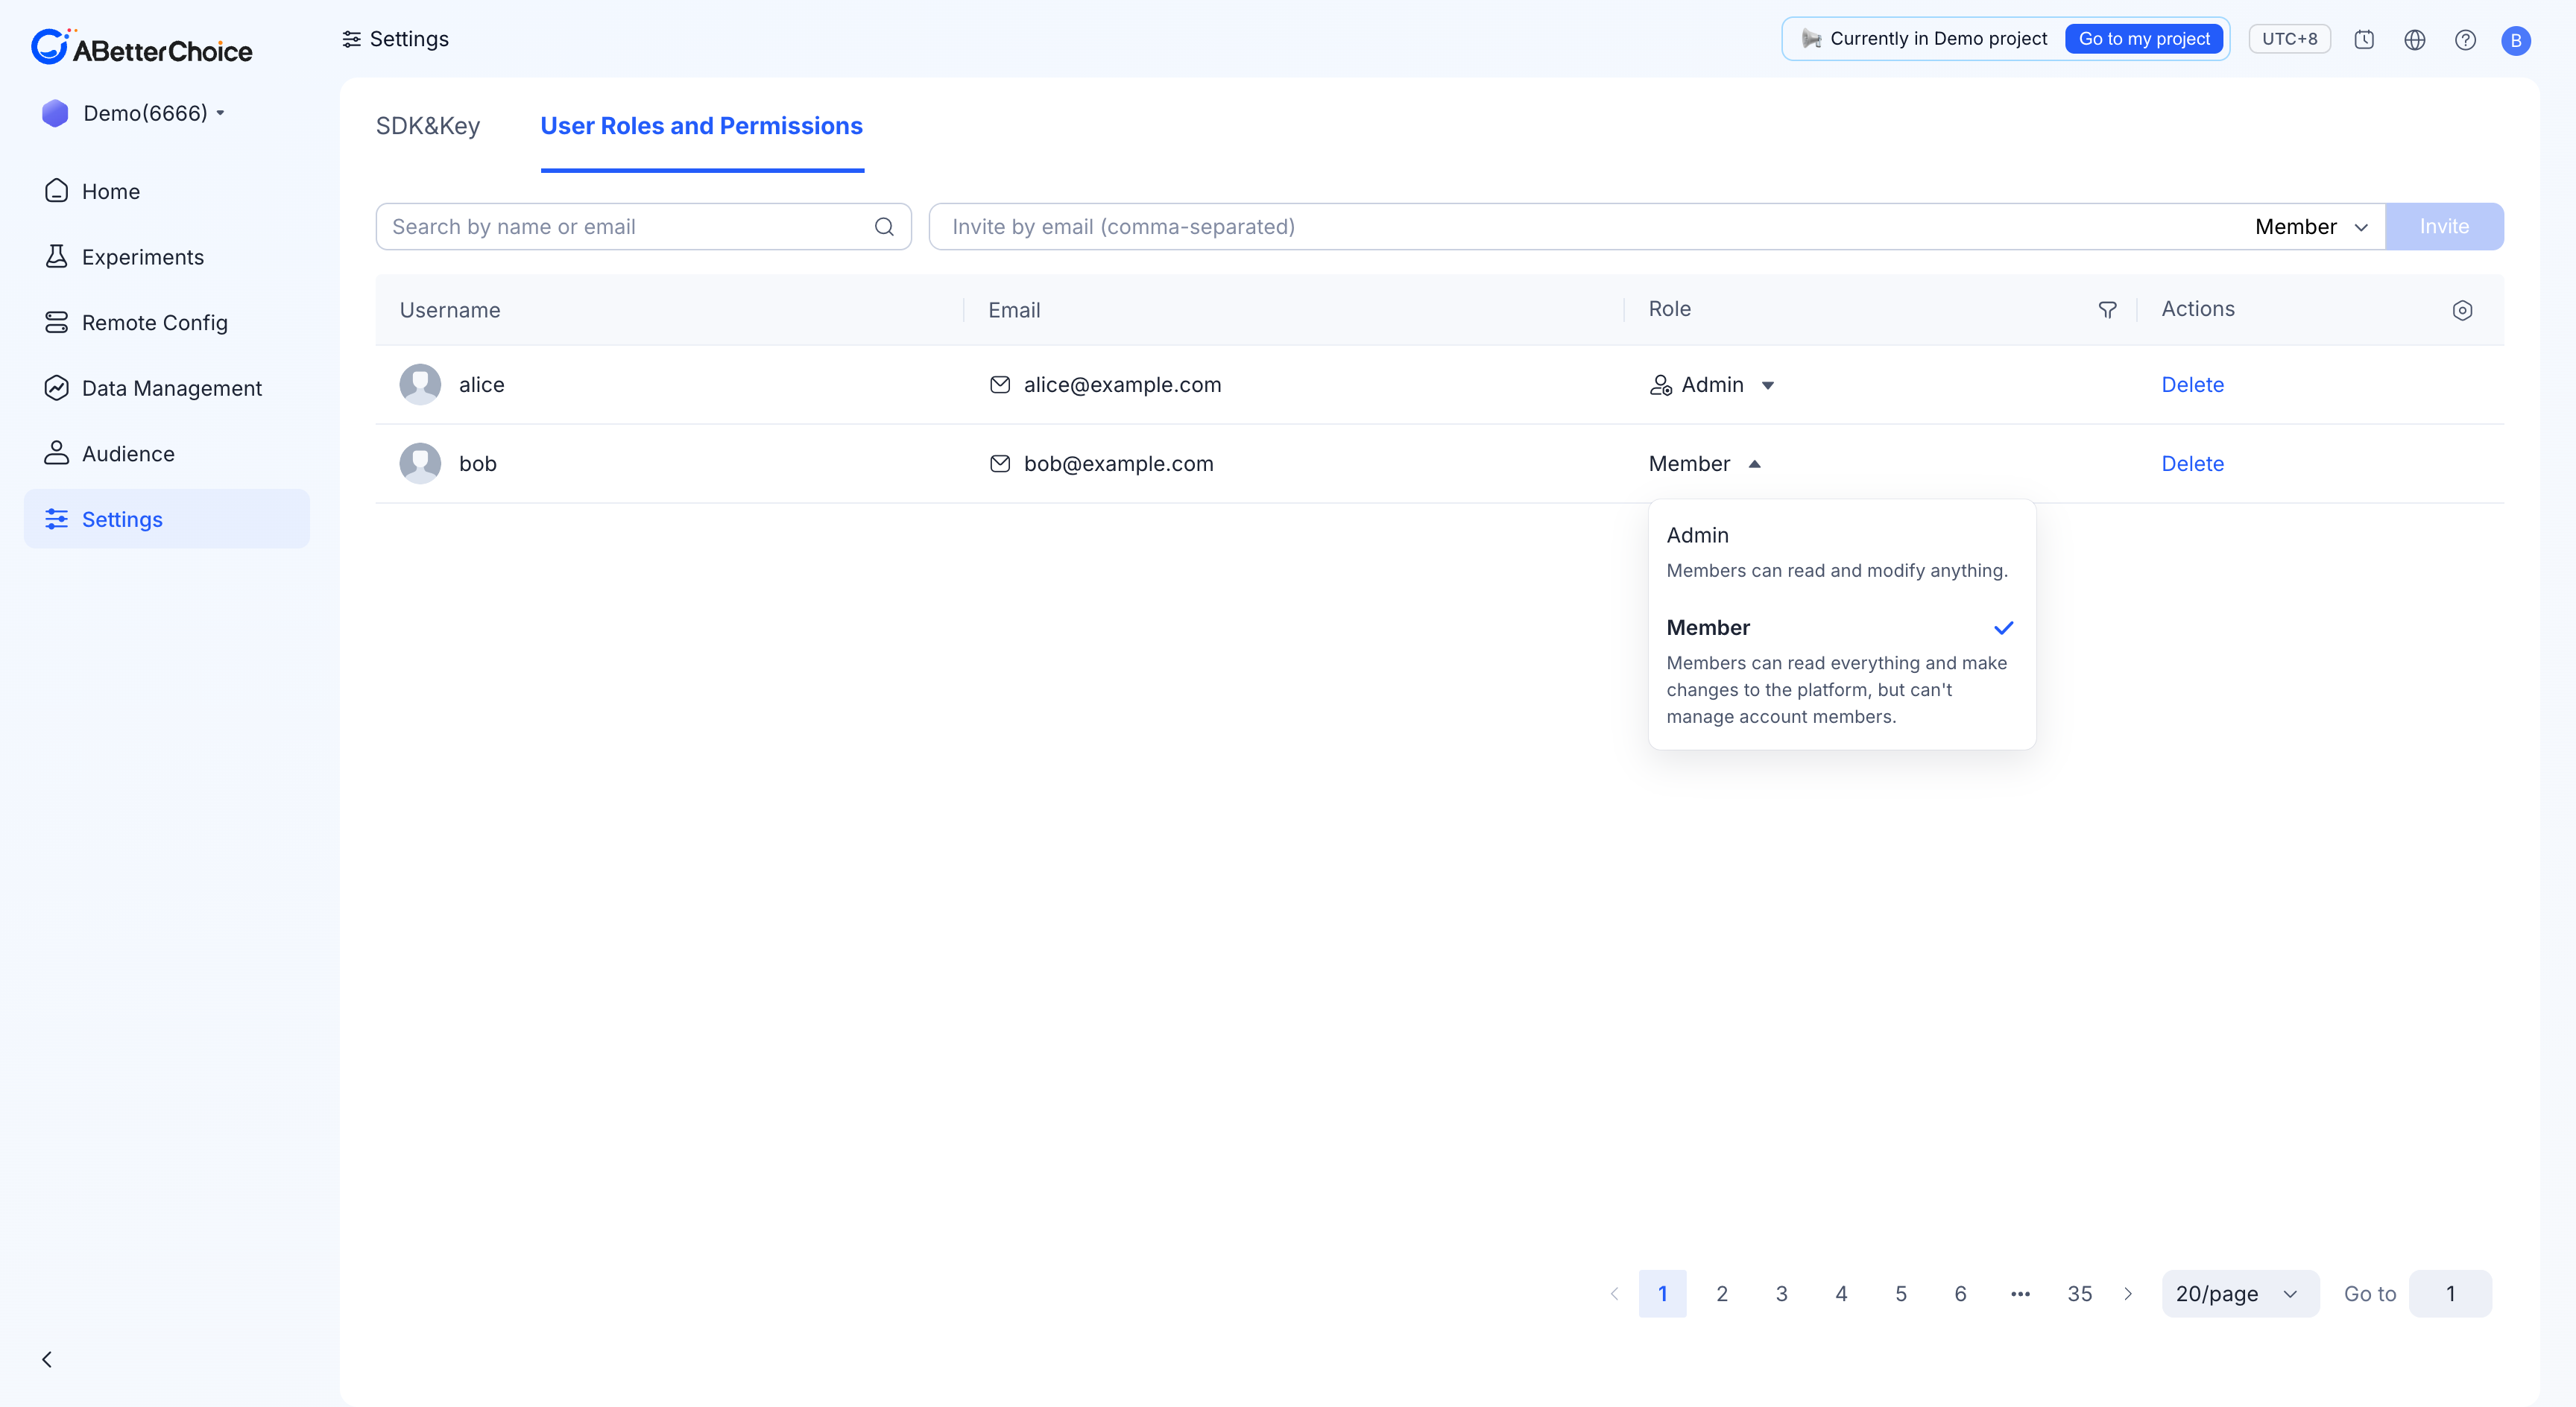
The in-product role picker (Settings → User Roles and Permissions, the Role column on each row) phrases the difference this way:
- Admin — Members can read and modify anything.
- Member — Members can read everything and make changes to the platform, but can't manage account members.
A project must always keep at least one admin. The console refuses to change or delete the last remaining admin so you cannot accidentally lock yourself out.
Invite a teammate
- Open Settings in the left sidebar and switch to the User Roles and Permissions tab.
- In the invitation box at the top of the page, paste one or more email addresses (comma-separated).
- Pick the Role (
Memberby default). - Click Invite.
After a successful invitation, the invitee can register and sign in with that email address; they will land directly inside this project.
Change a role
Go to Settings → User Roles and Permissions. Each row exposes its role as an inline dropdown in the Role column. Click the current role, pick the new one, and the change applies immediately. The popover also reminds you what each role can do.
Remove a member
In the same table, click Delete in the Actions column on the member's row. The member loses all access to this project on the next page load.
The last admin in the project cannot be deleted and cannot be downgraded. Promote another member to
adminfirst if you need to leave the project.
Filtering and search
Use the Search by name or email input above the table to find a specific member, and the Role column header has a filter icon to scope the list to admins or members only.